Outlook Calendar Colors - Everything you need to know in 2026
Table of Contents
Ready to Sync Your Calendars?
Create a OneCal account to sync multiple Outlook, iCloud and Google Calendars, create Booking Links, and much more.
In this article, we’ll explain everything you need to know about using colors in Outlook Calendar, helping you keep a more organized schedule and track your events more easily.
Why should you use colors in Outlook Calendar?
Color coding your Outlook Calendar and events can be helpful because:
It keeps your schedule more organized: Different meetings have different priorities and purposes, so color coding can help you visualize which meetings are more urgent and which are not.
Helps you distinguish between calendars: In case your account has more than one calendar, you can color-code each calendar so you can distinguish between them.
Spot free and busy slots faster: If you color-code your events, you can find free time slots faster, as busy slots would have a different color than the free slots.
Are you a Google Calendar user? Check our guide on managing Google Calendar colors.
How to change the color of an Outlook Calendar
To change the color of an Outlook Calendar, follow these steps:
Open Outlook on the web by accessing https://outlook.live.com/calendar
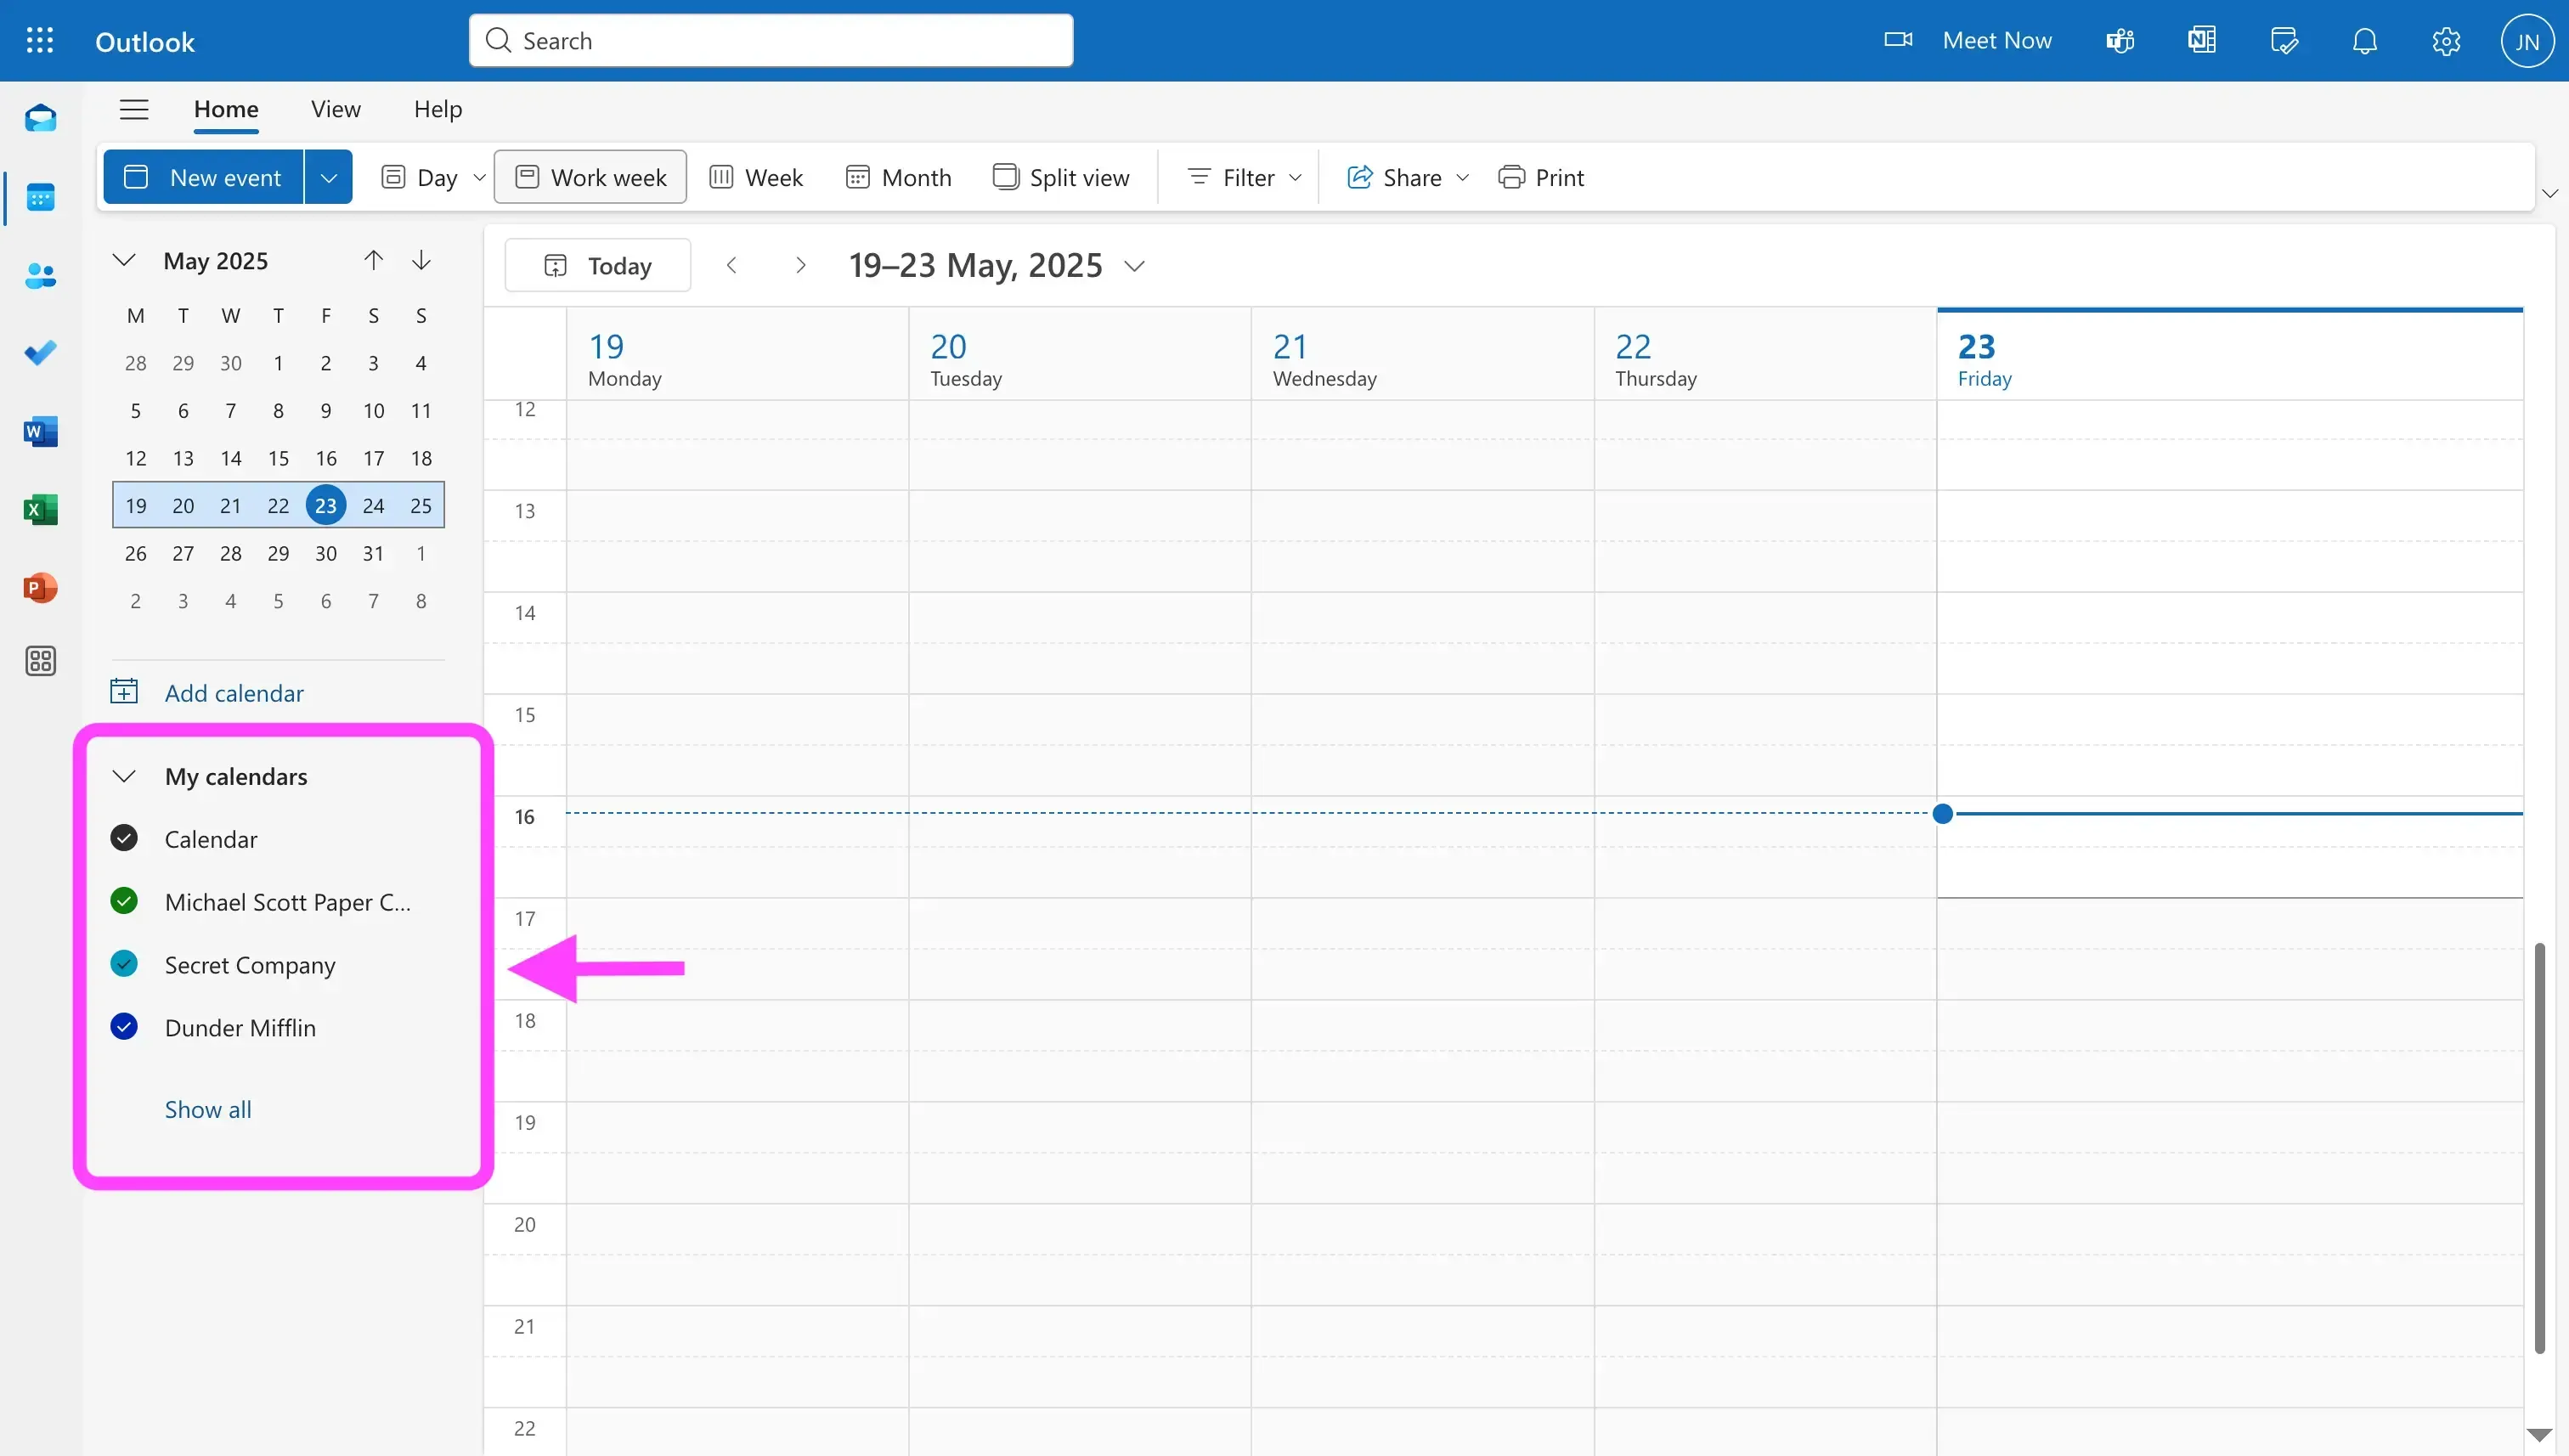
Find the calendar you want to change the color of: The calendars are located in the “My Calendars” section, on the left side bar.
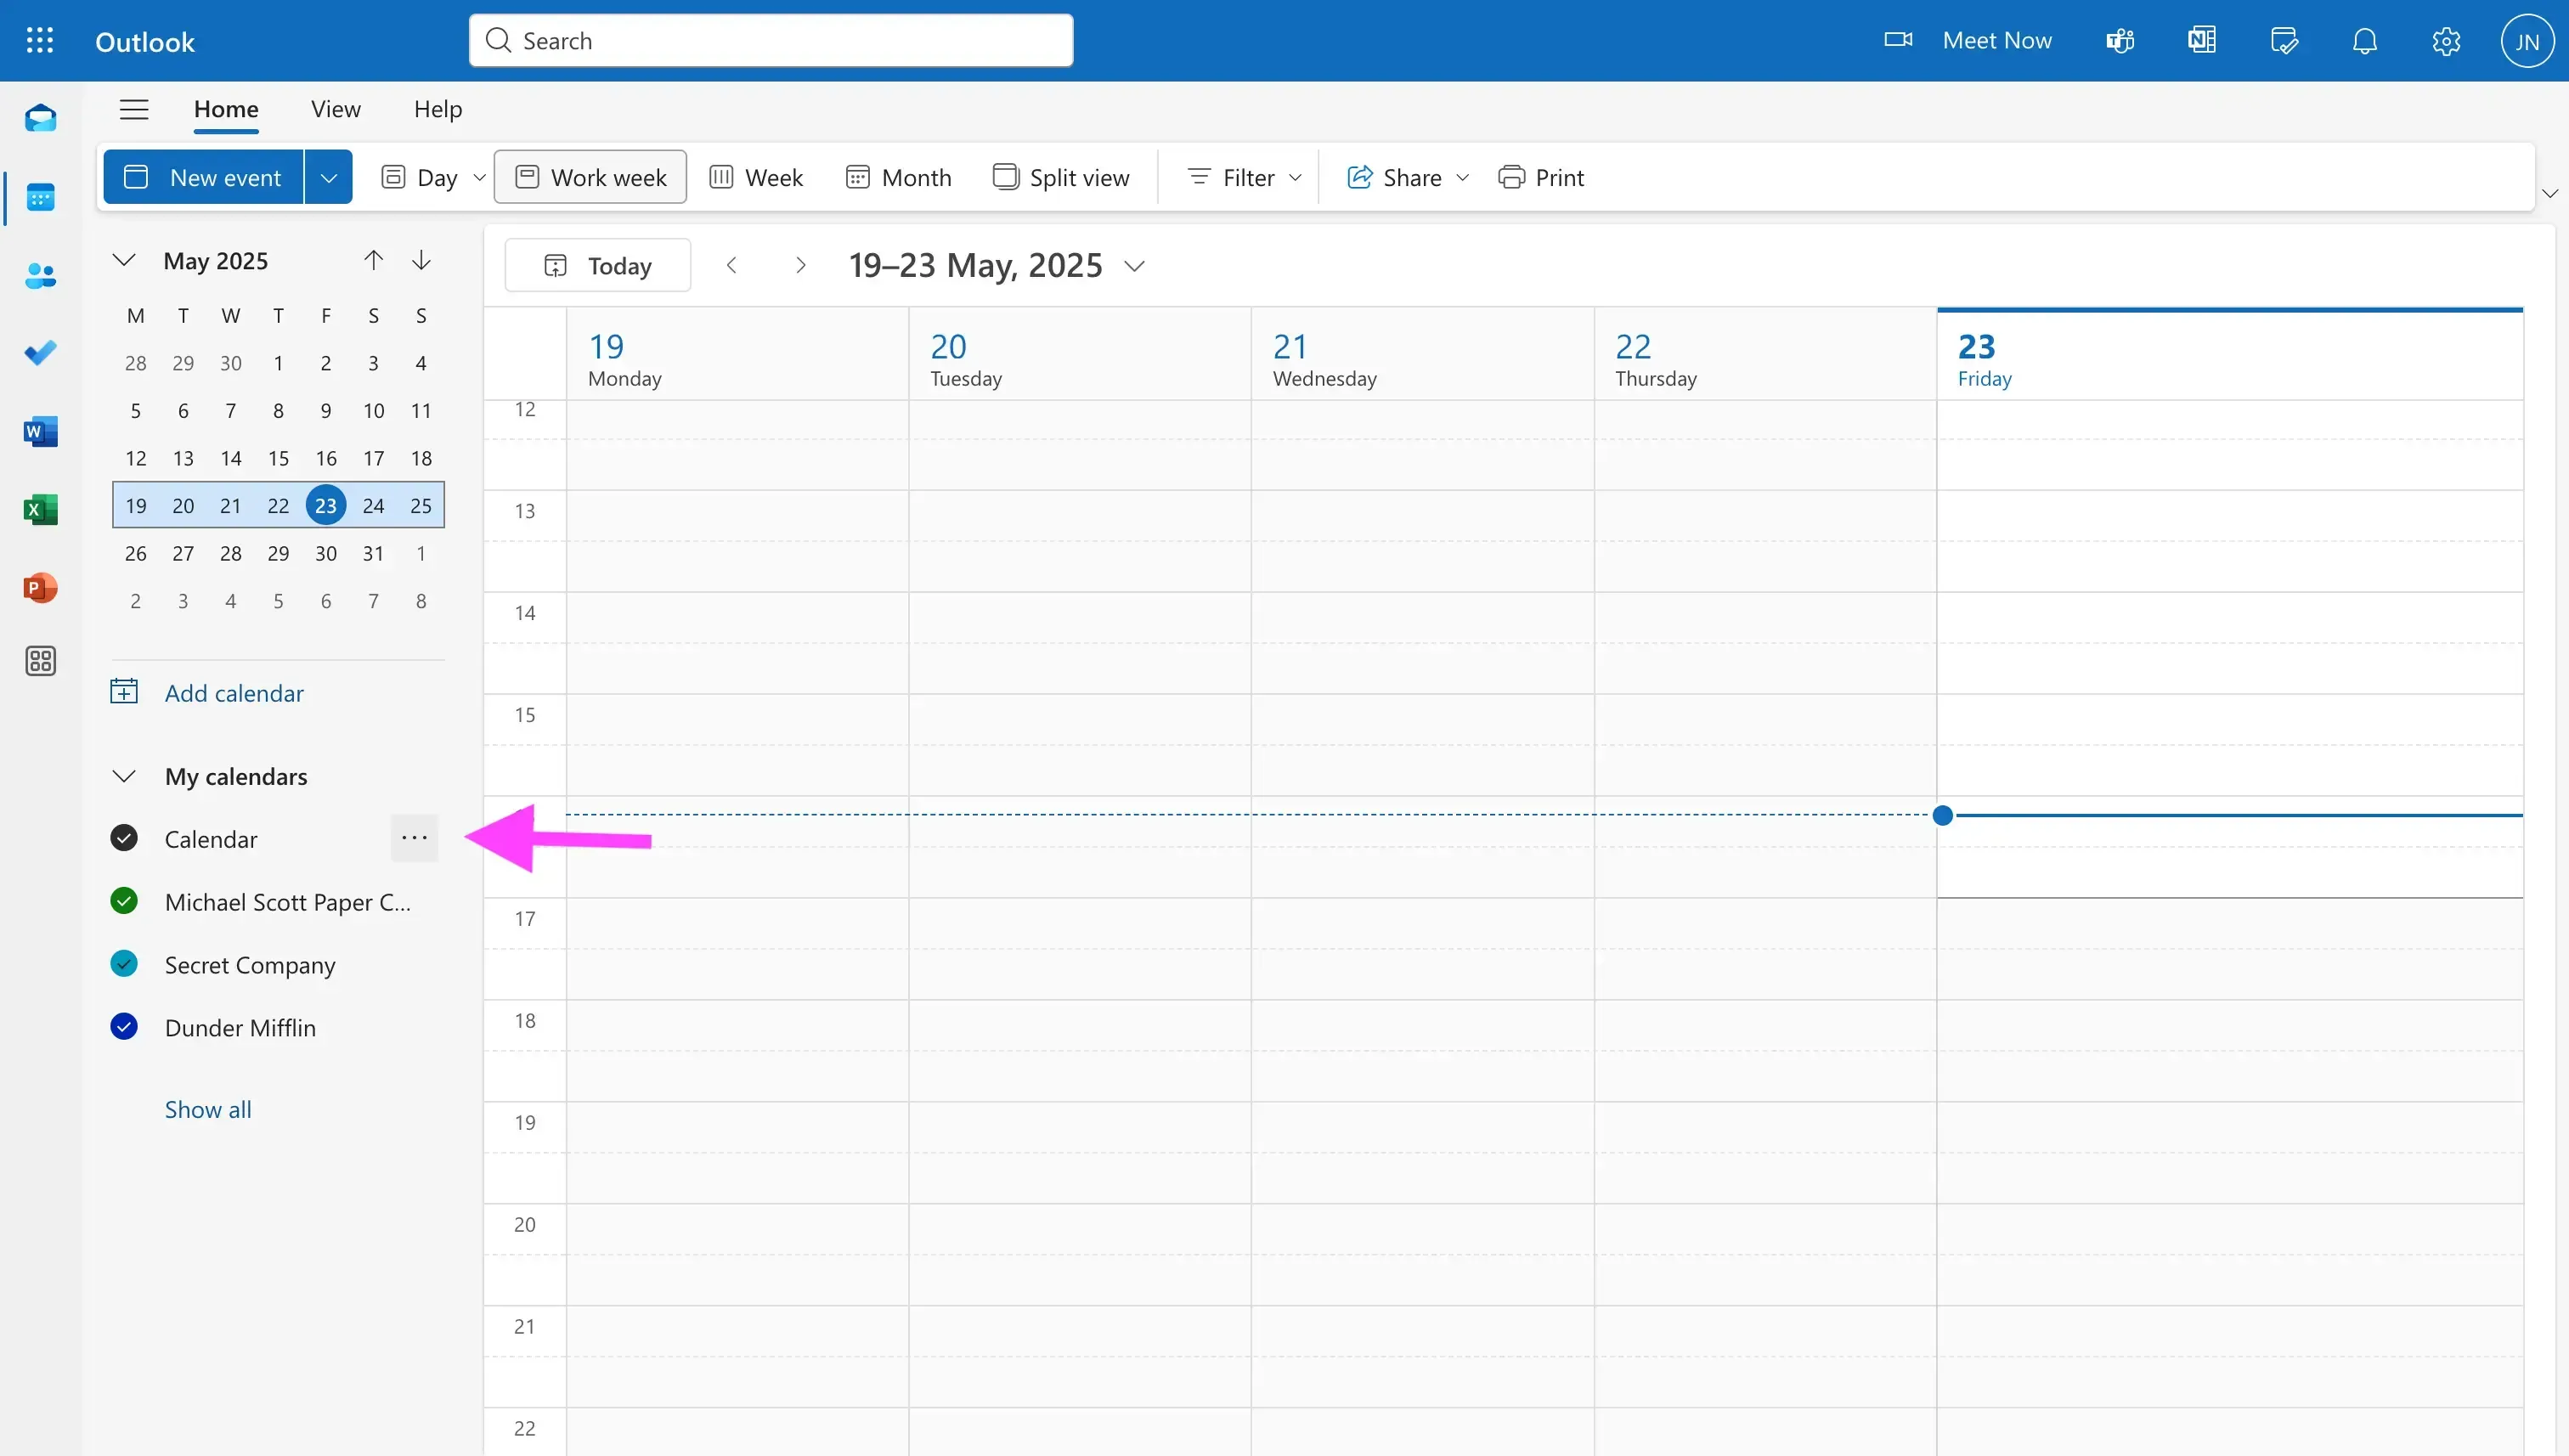
Hover the calendar and click the three dots icon.
Click “Colour” on the menu that pops up.
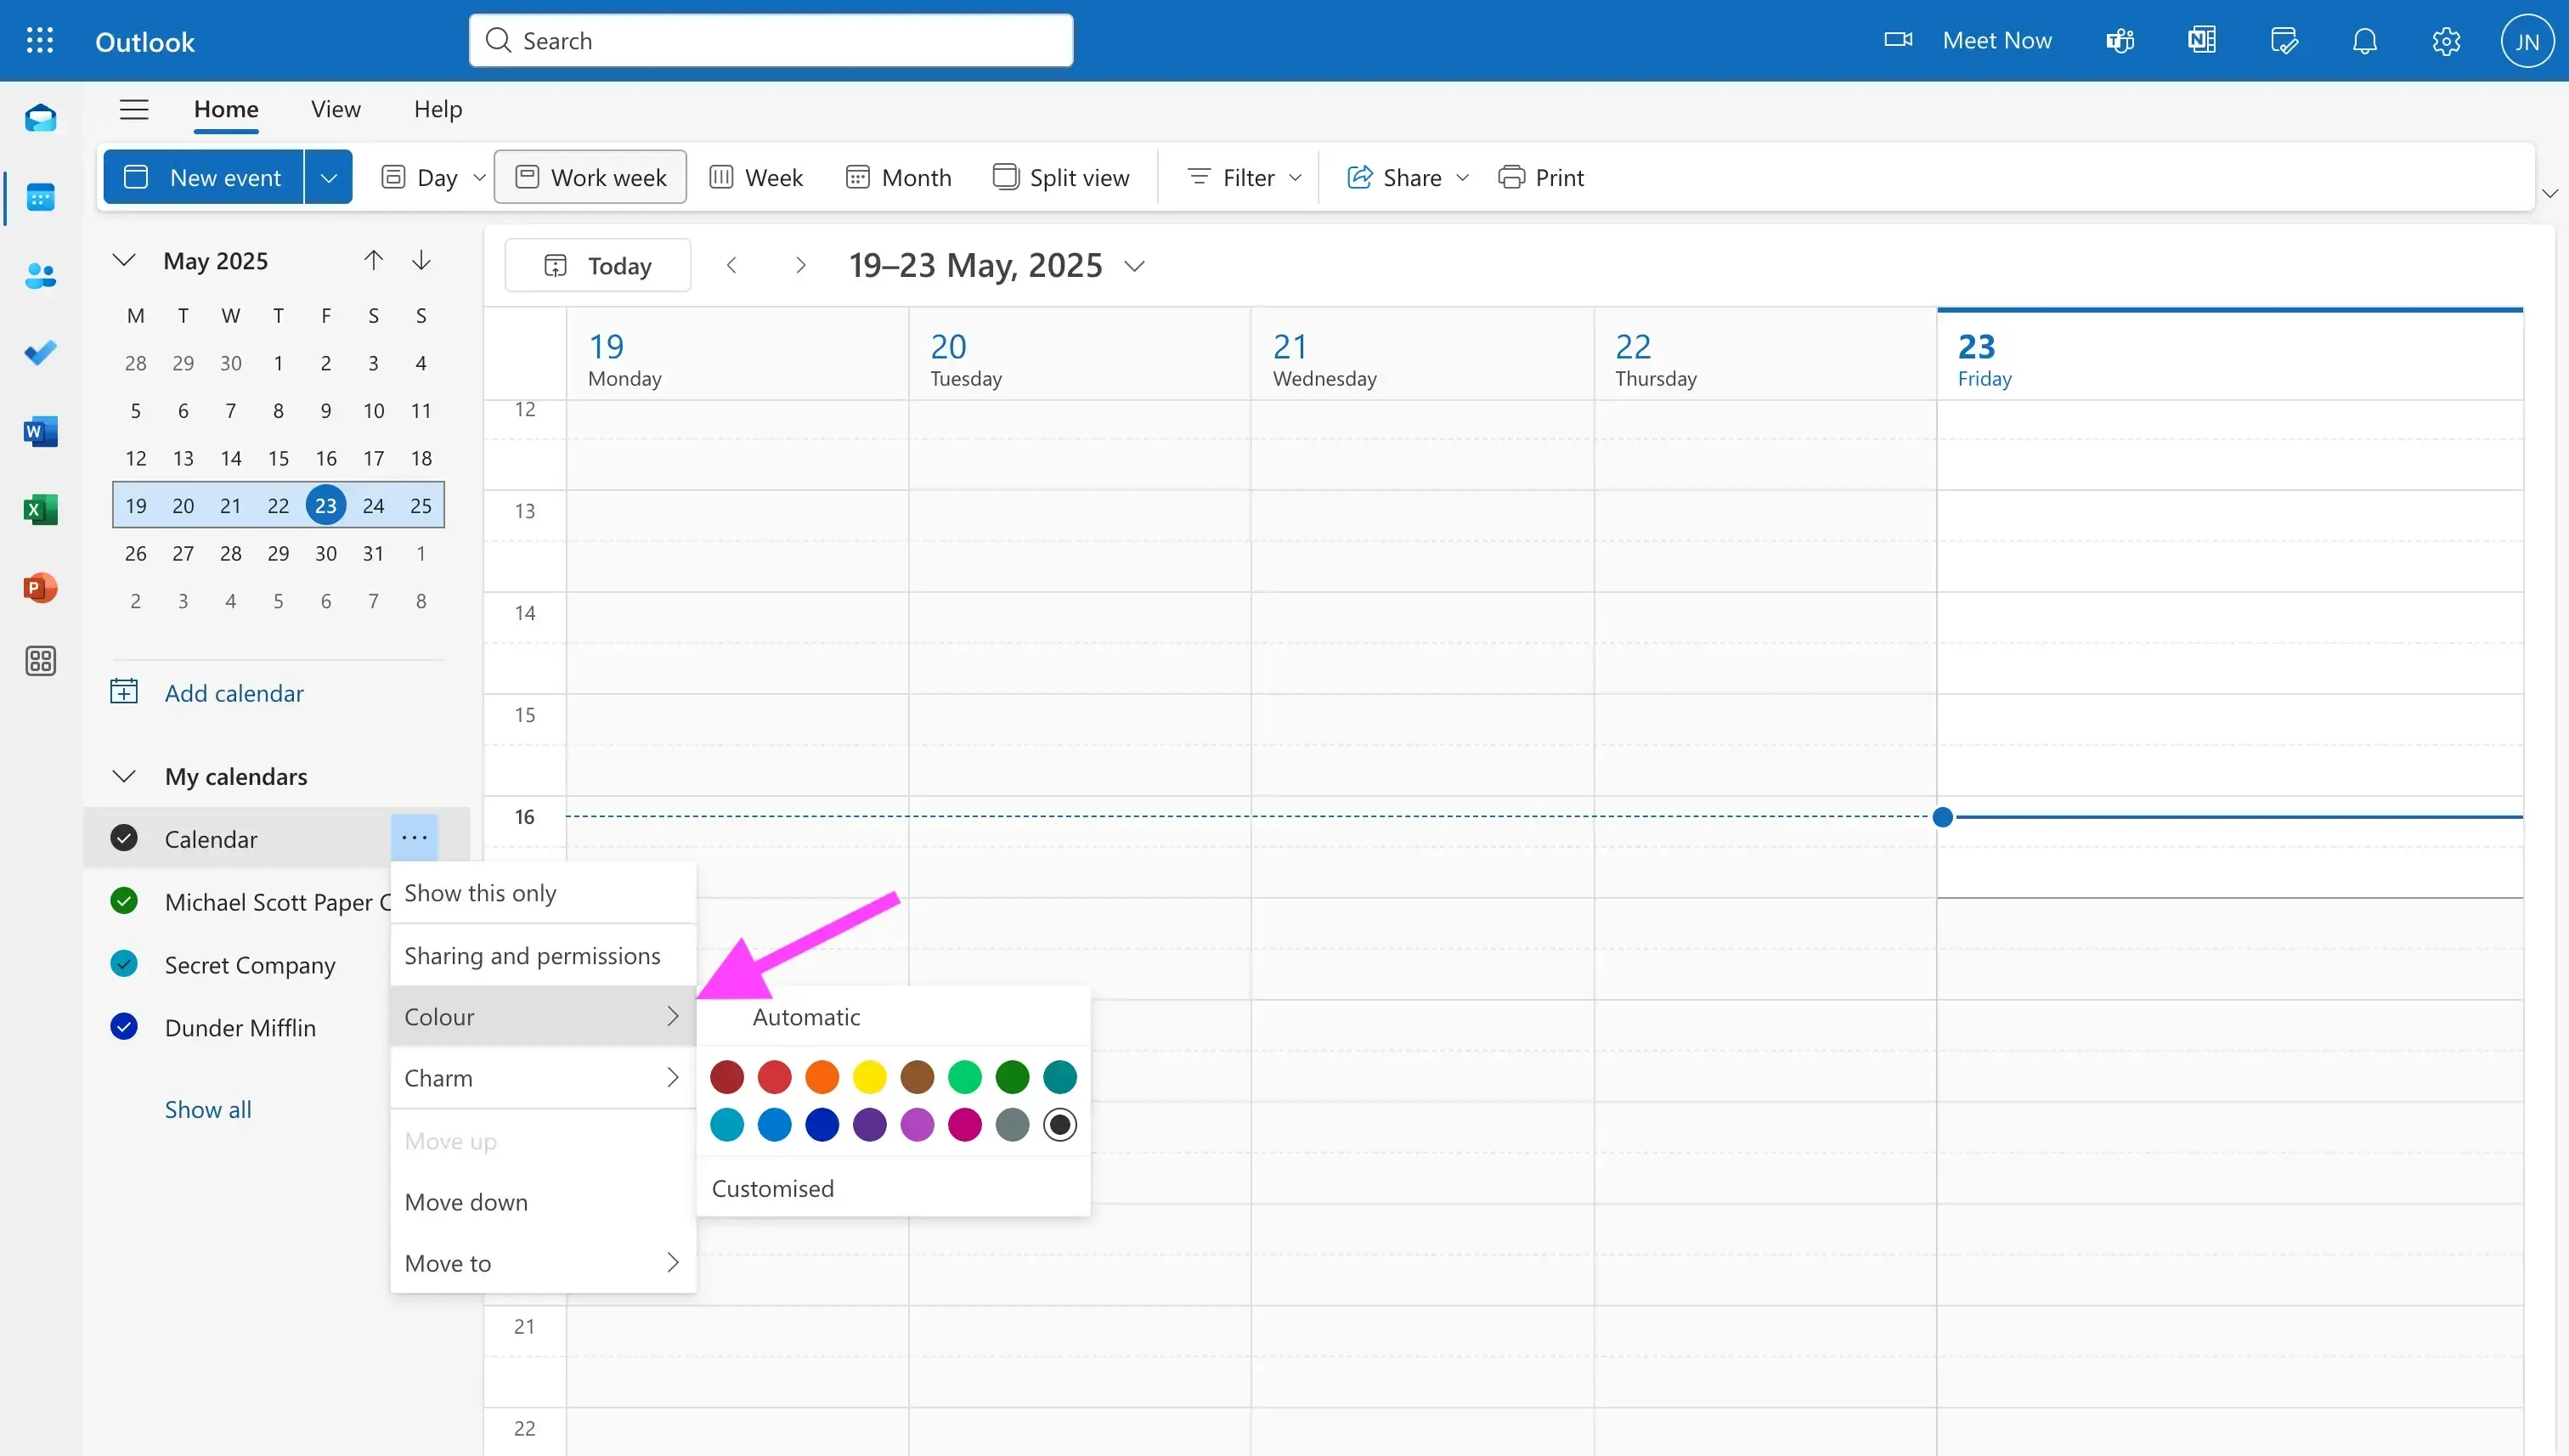
Choose between Automatic, preset colors, or Customized. By default, the “Automatic” option is pre-selected by Outlook. You can change it by selecting the preset colors below, or click Customized to enter a custom hex color.
How to color-code an Outlook Calendar event
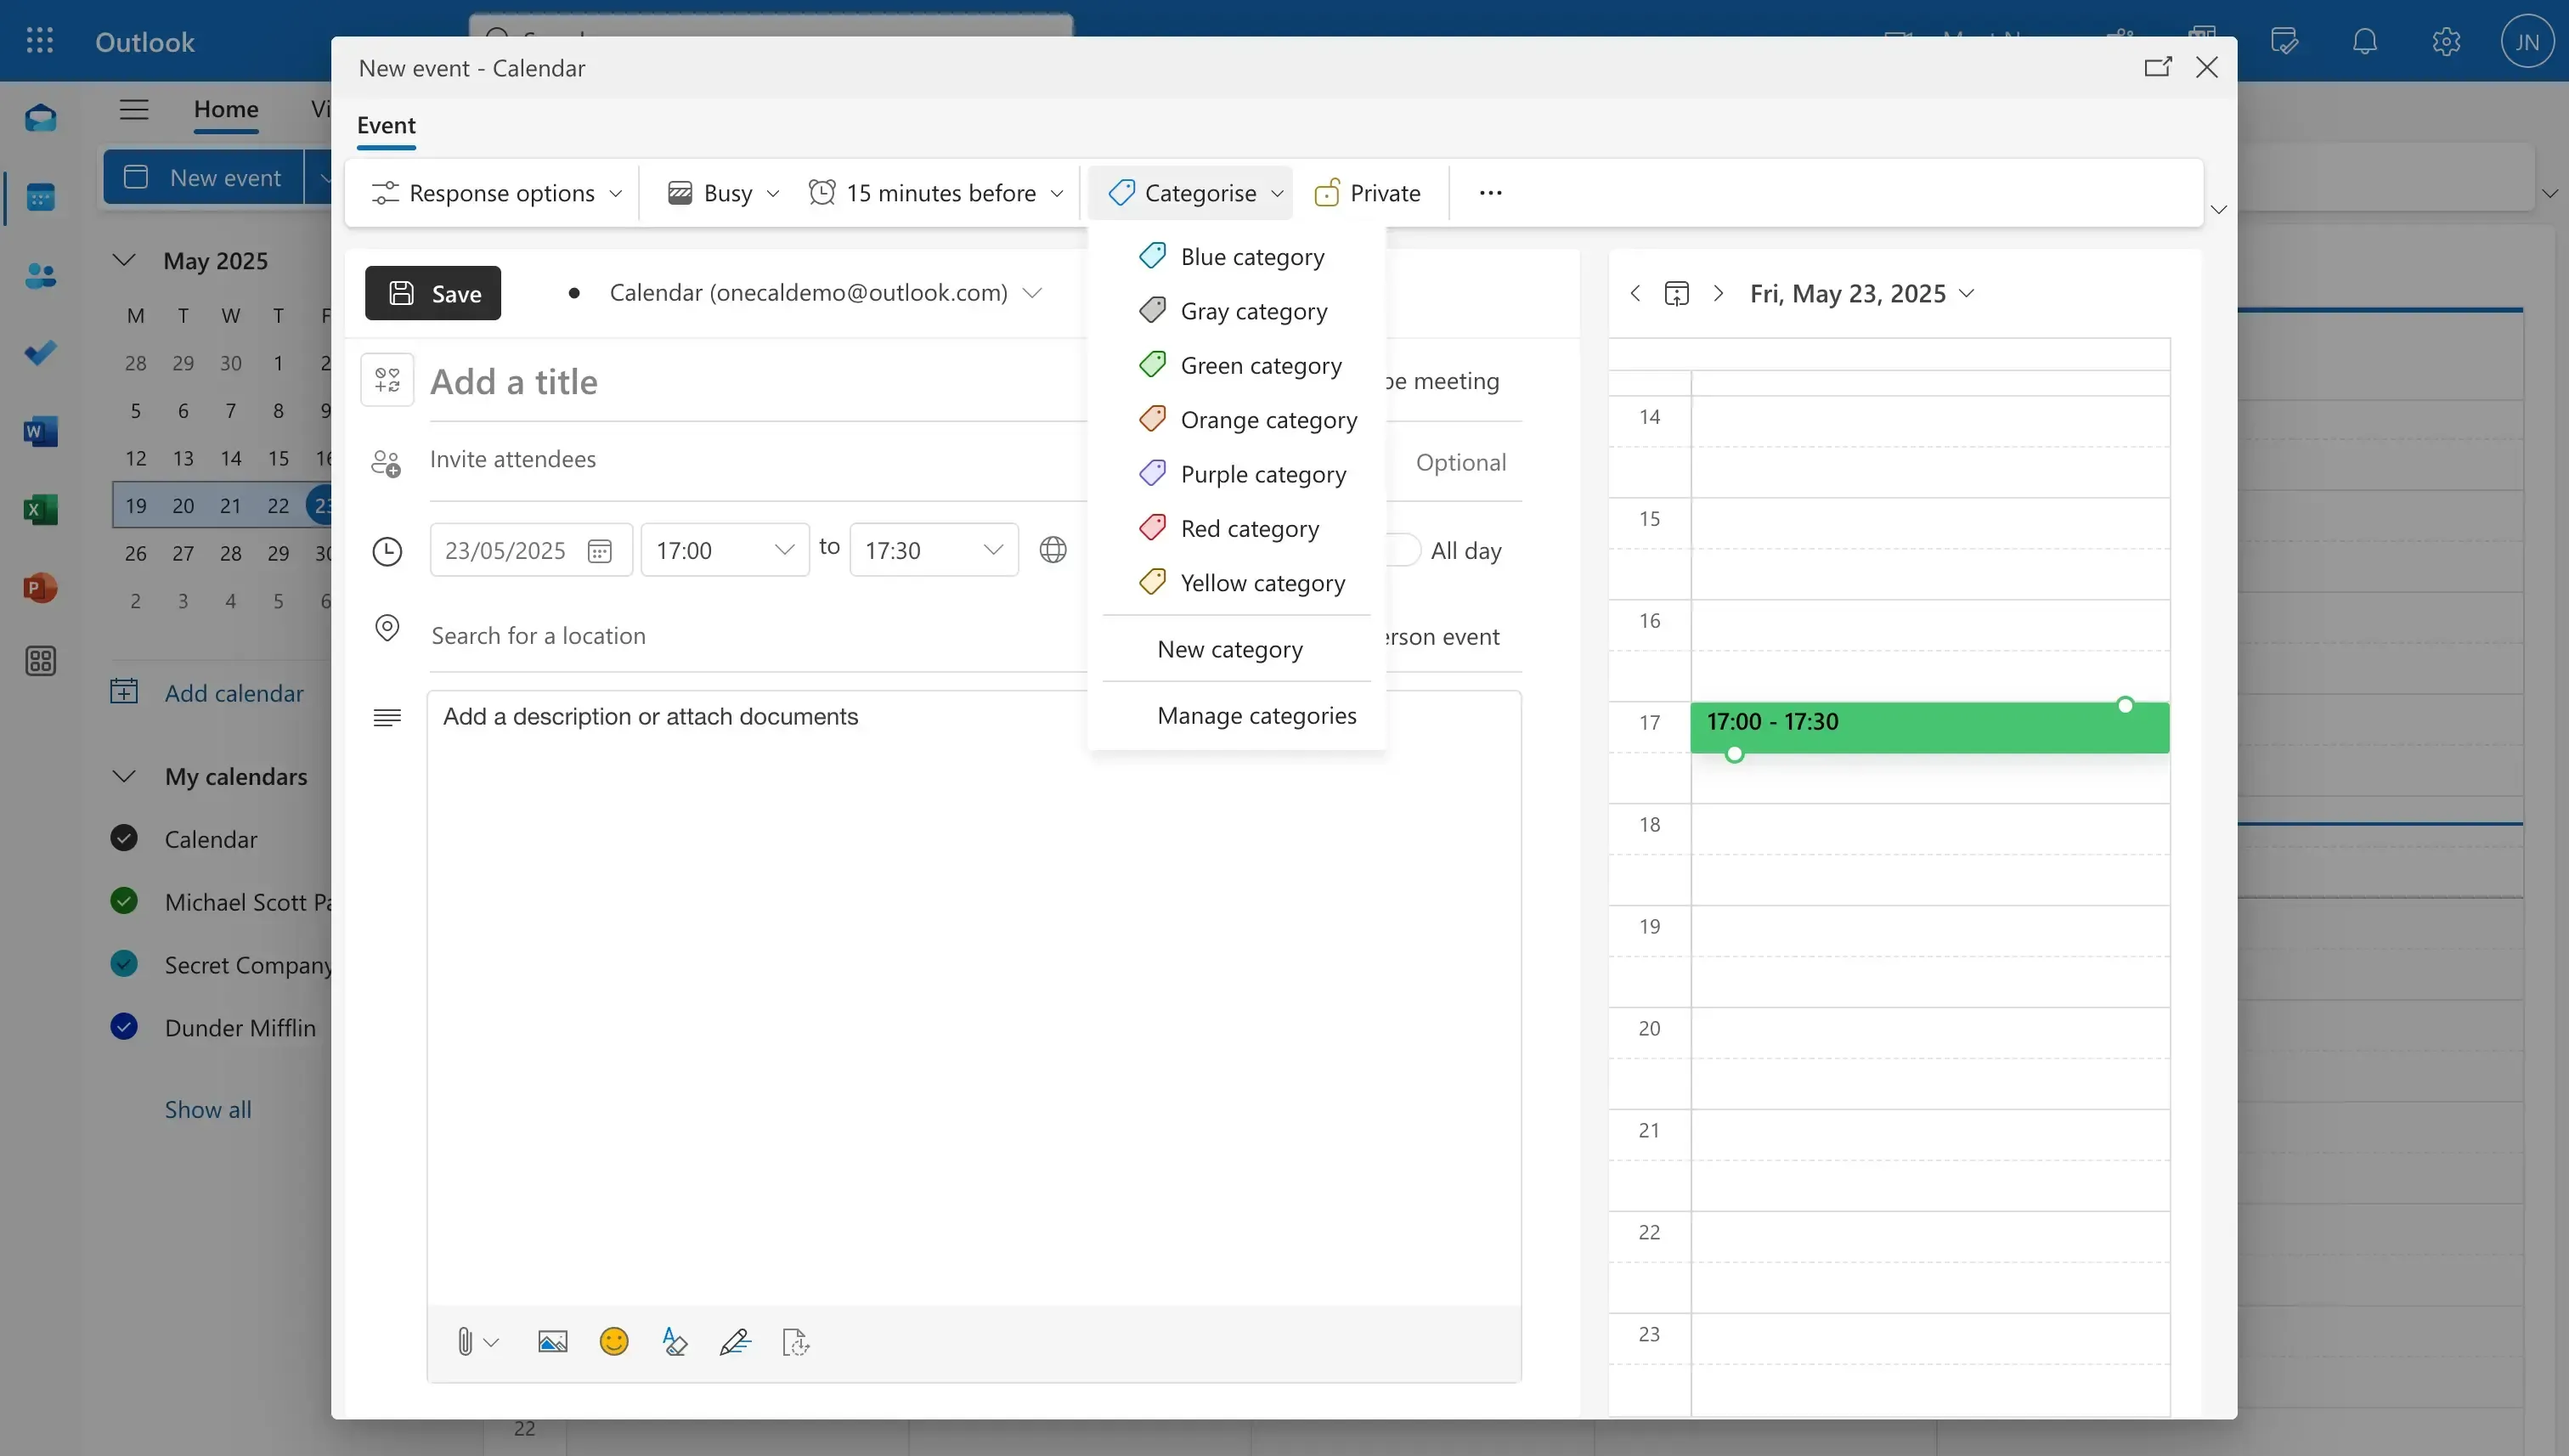
Color coding Outlook Calendar events is done through Categories. By default, Outlook creates the following categories:
Blue Category
Gray Category
Green Category
Orange Category
Purple Category
Red Category
Yellow Category
To color-code an Outlook event, follow these steps:
Open Outlook on the web by accessing https://outlook.live.com/calendar
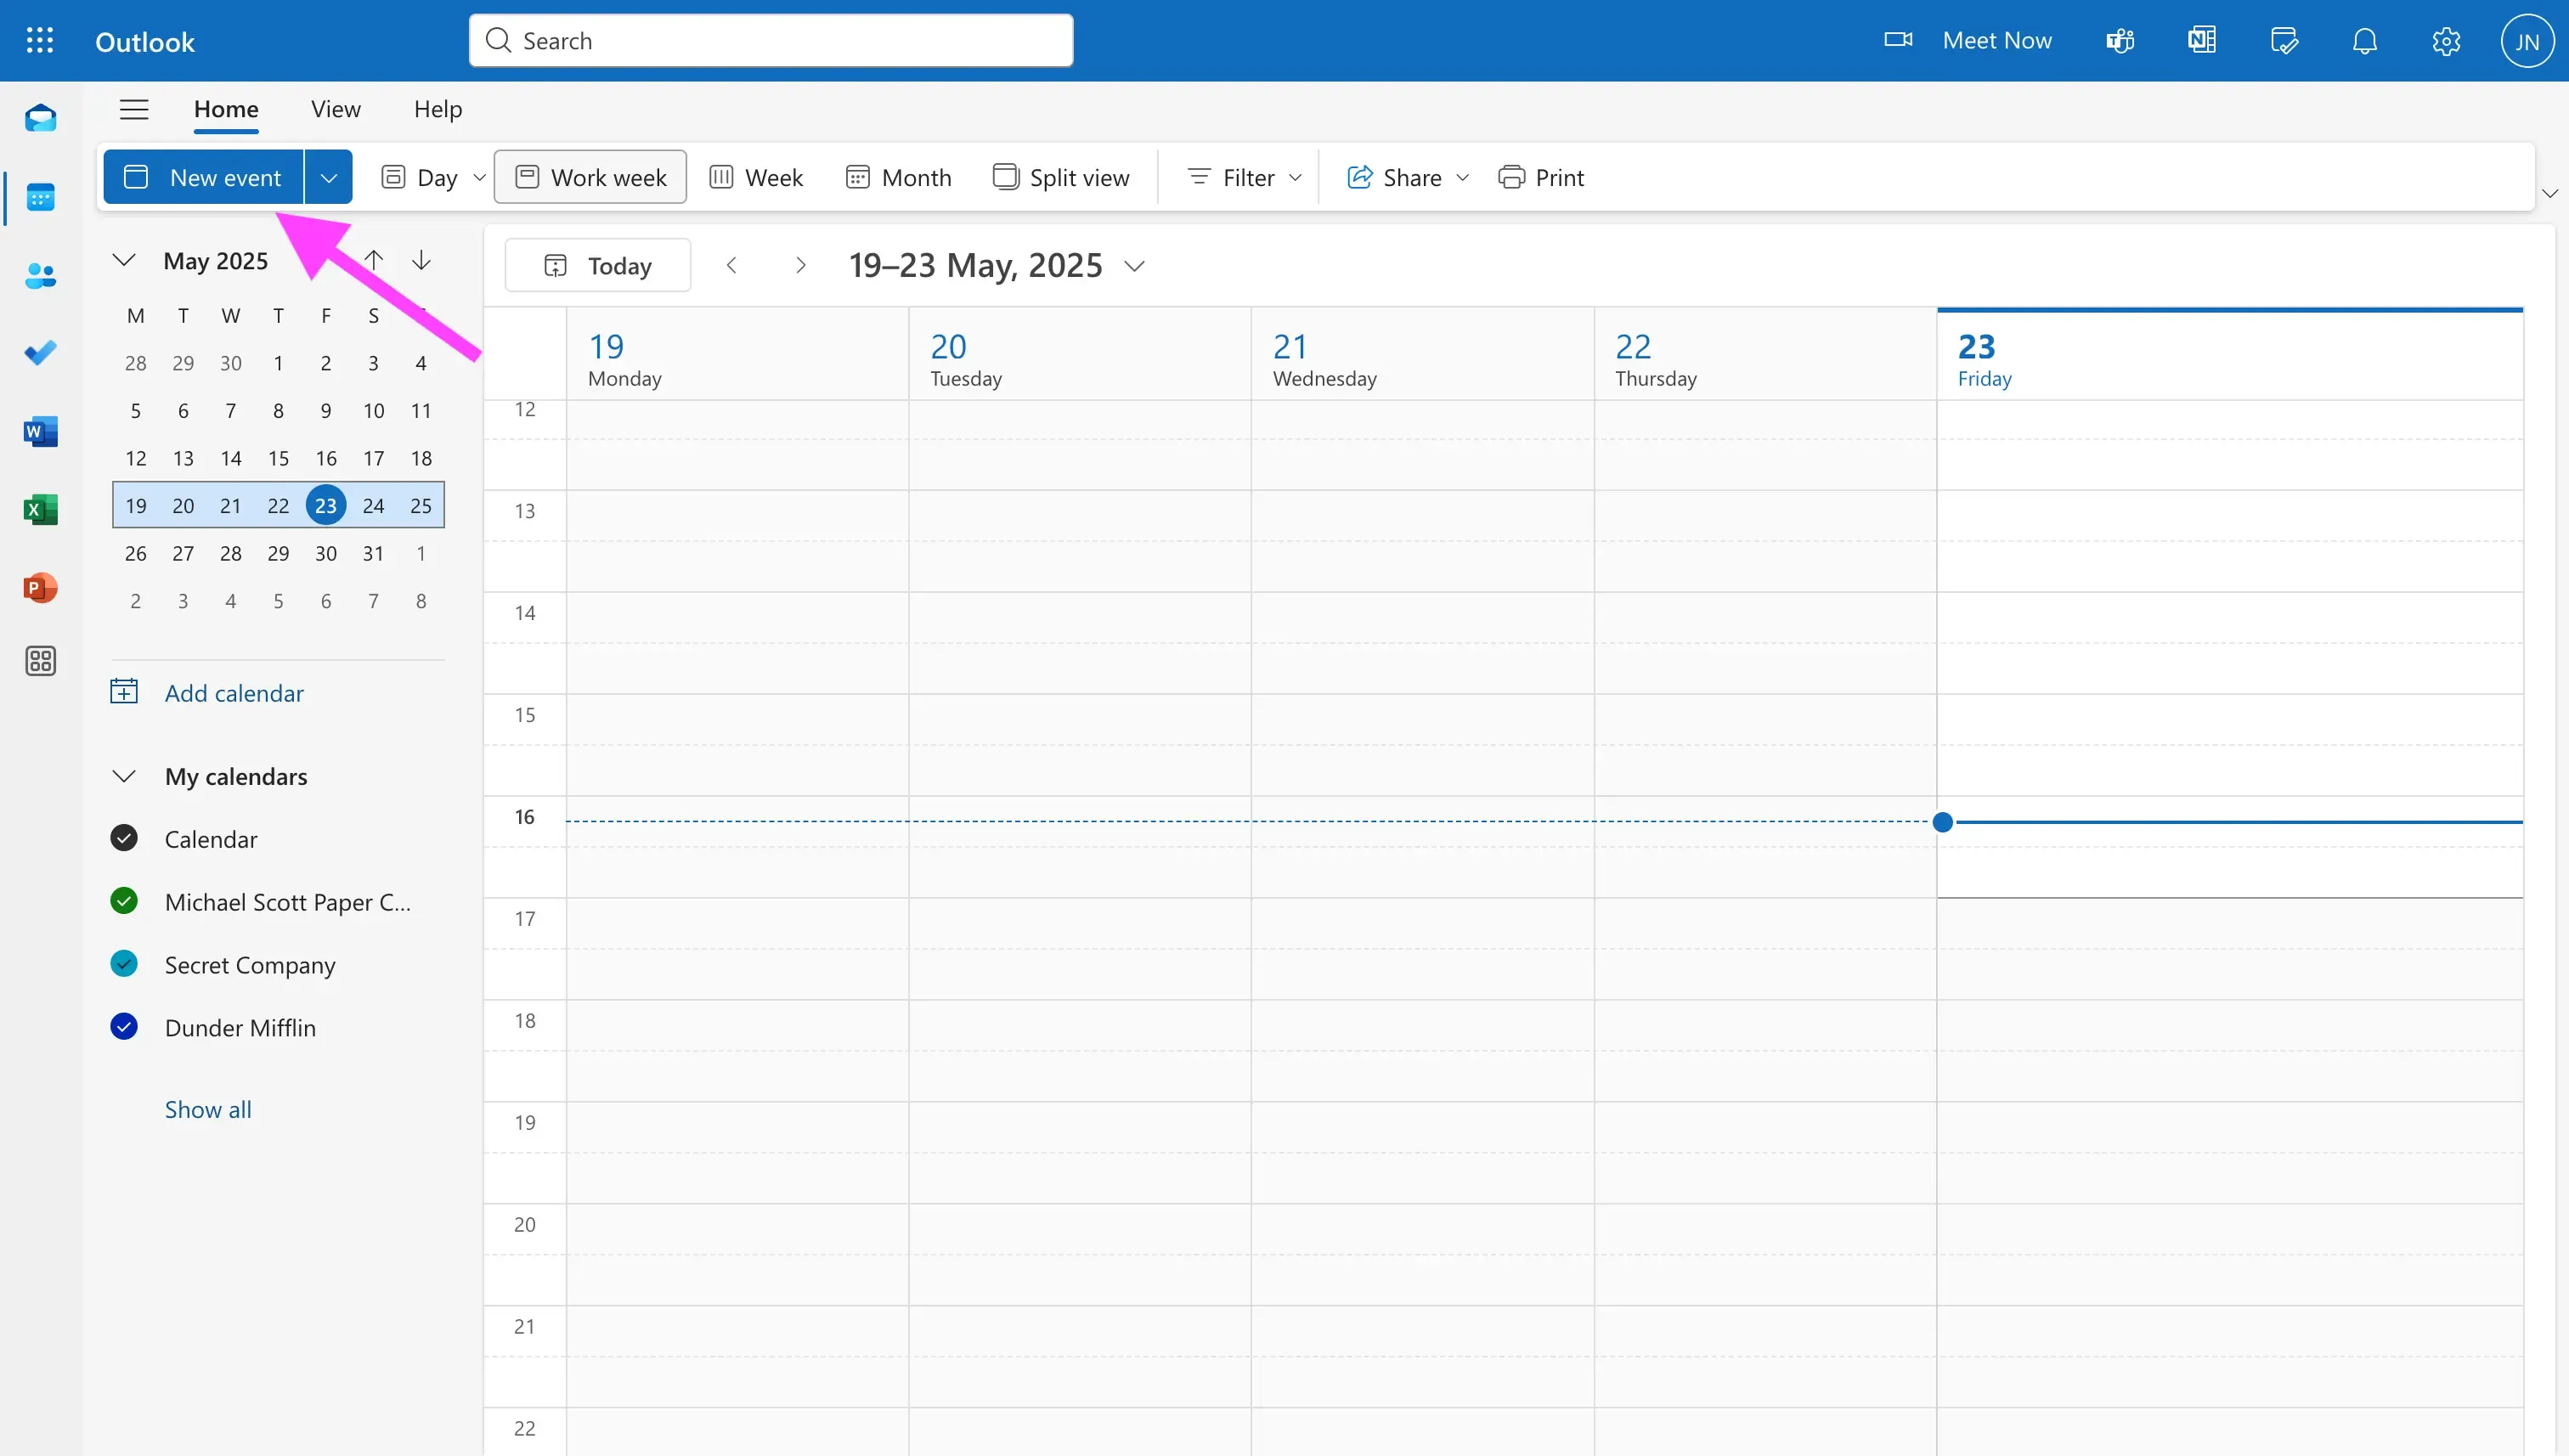
Click “New Event” on the top left of the page
Click “Categorise”. After clicking it, you’ll see the default color categories. If you want to add more categories to Outlook, follow the step below.
How to add more colors to Outlook Calendar
As mentioned above, Outlook color coding works through categories. To add more categories to Outlook, follow these steps:
Open Outlook on the web by visiting https://outlook.live.com/calendar
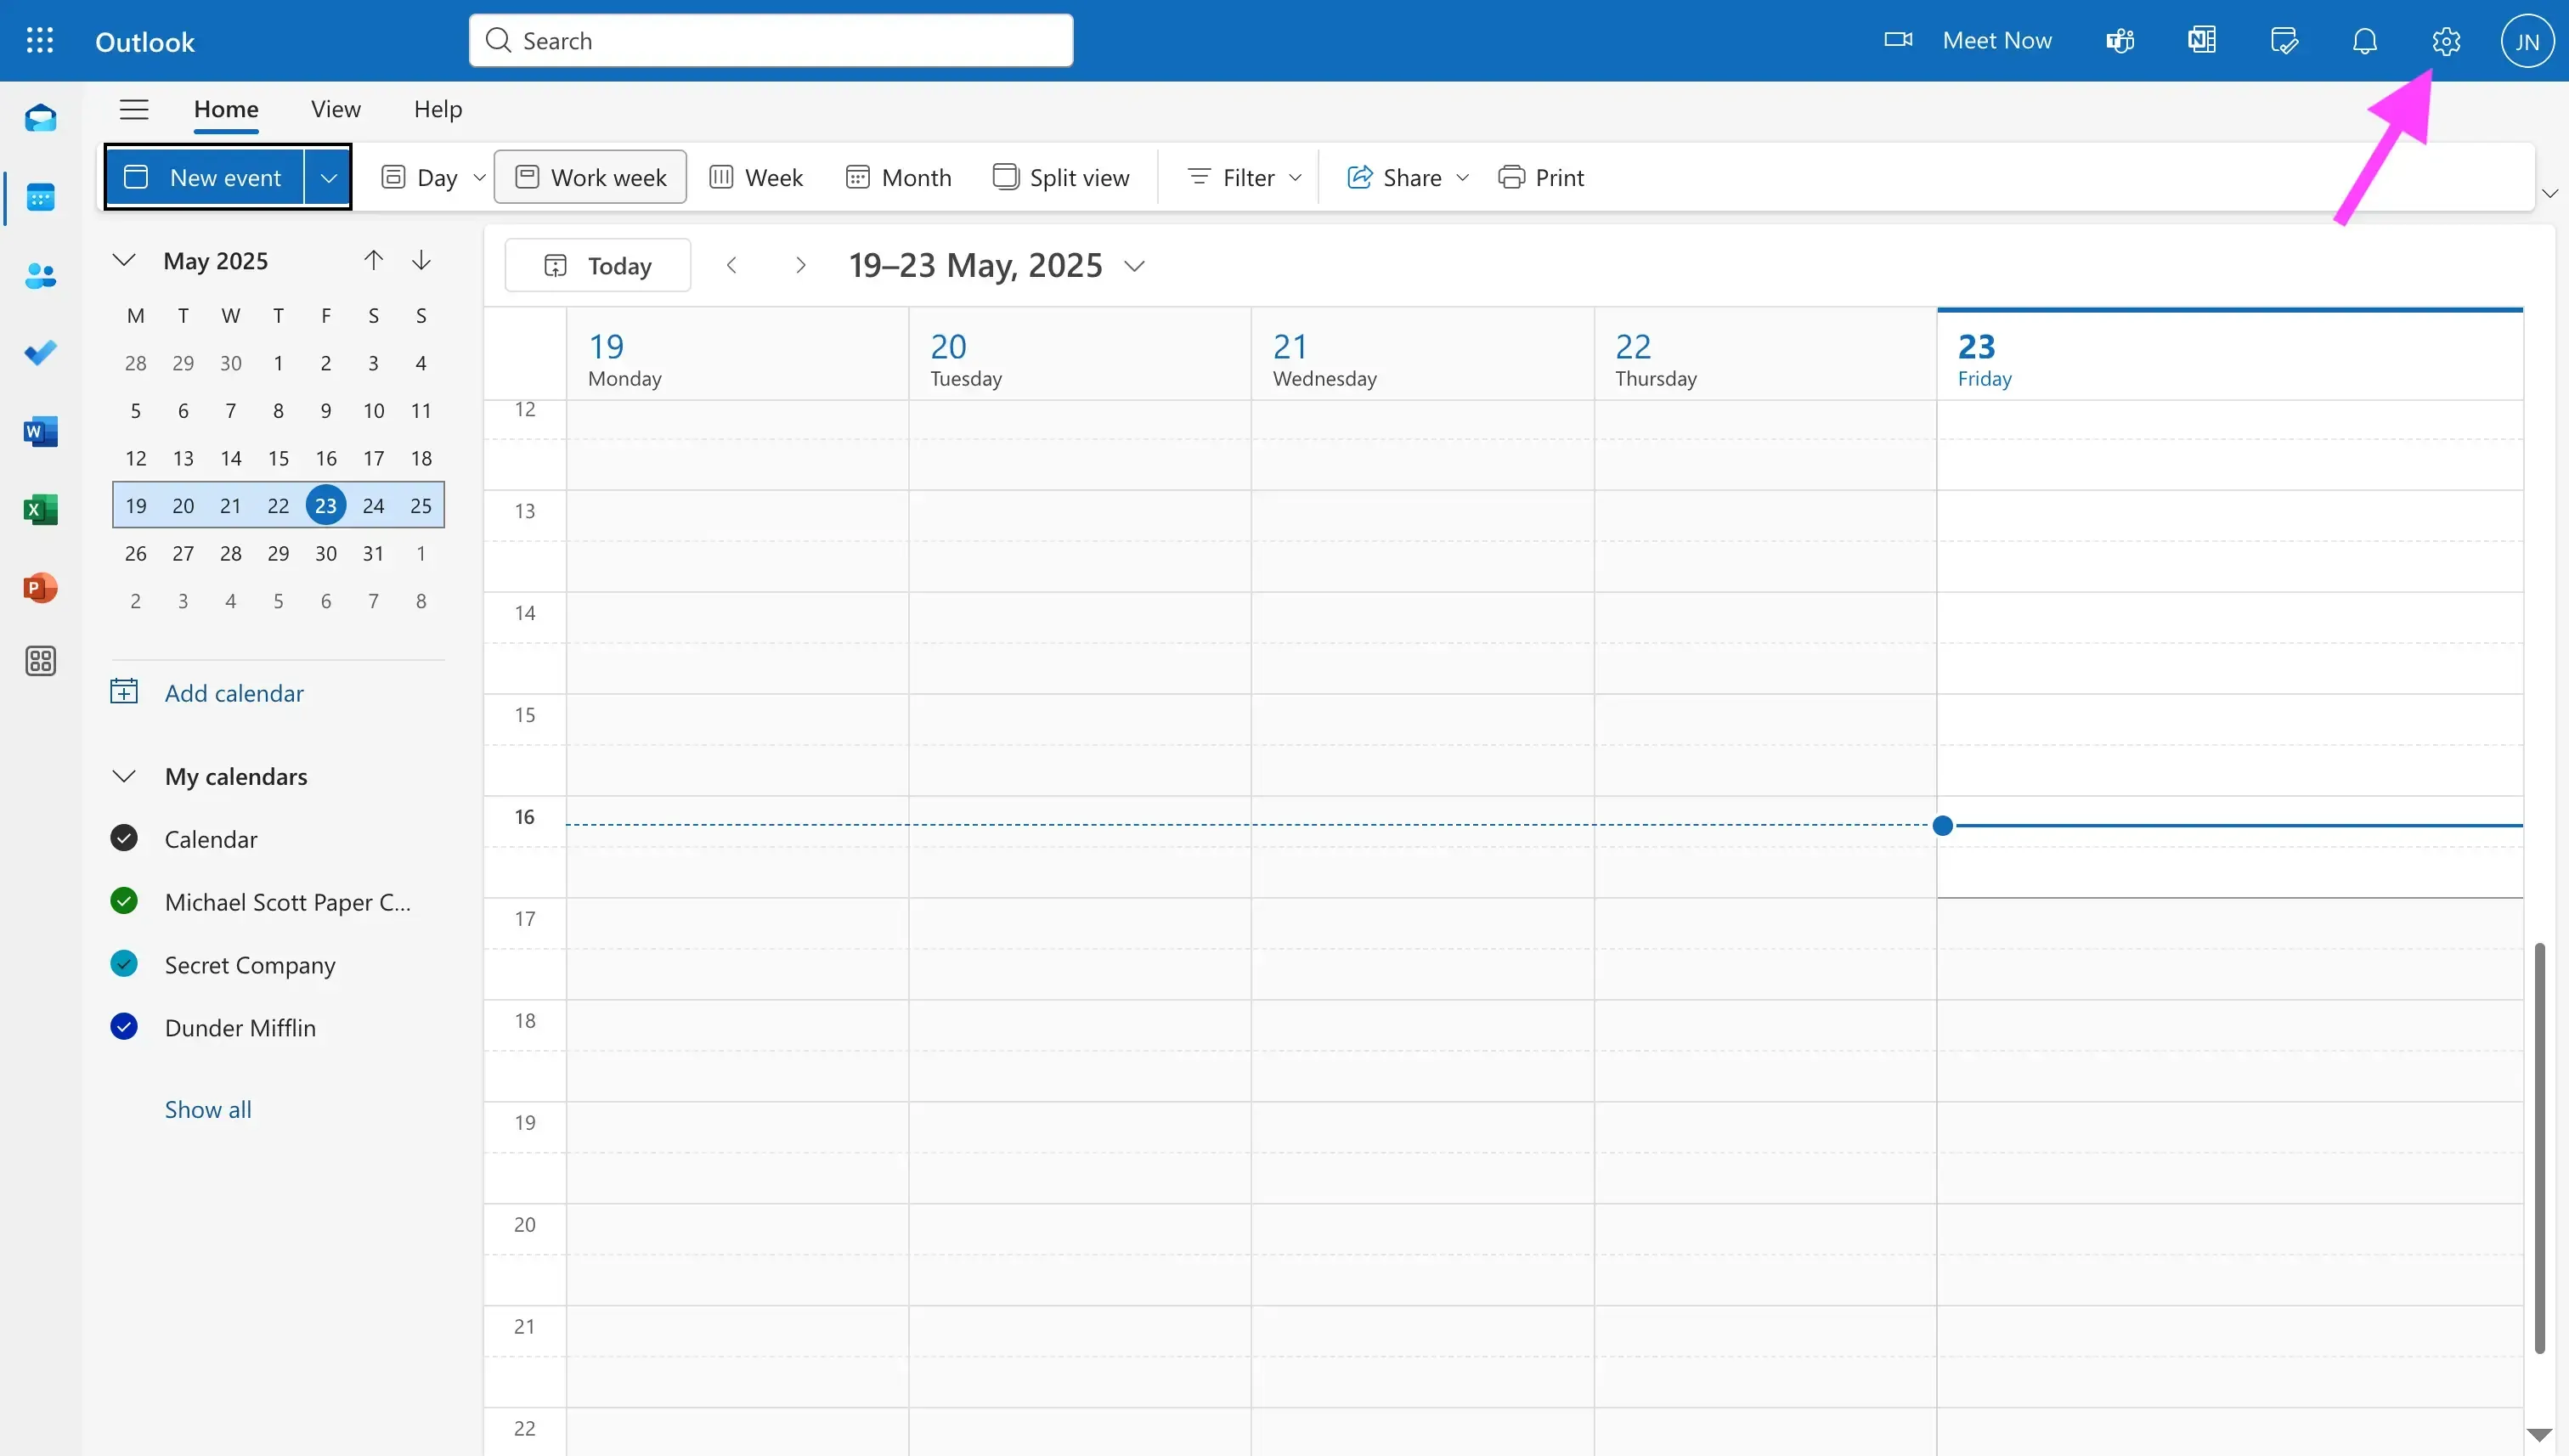
Click the Settings icon on the top-right header.
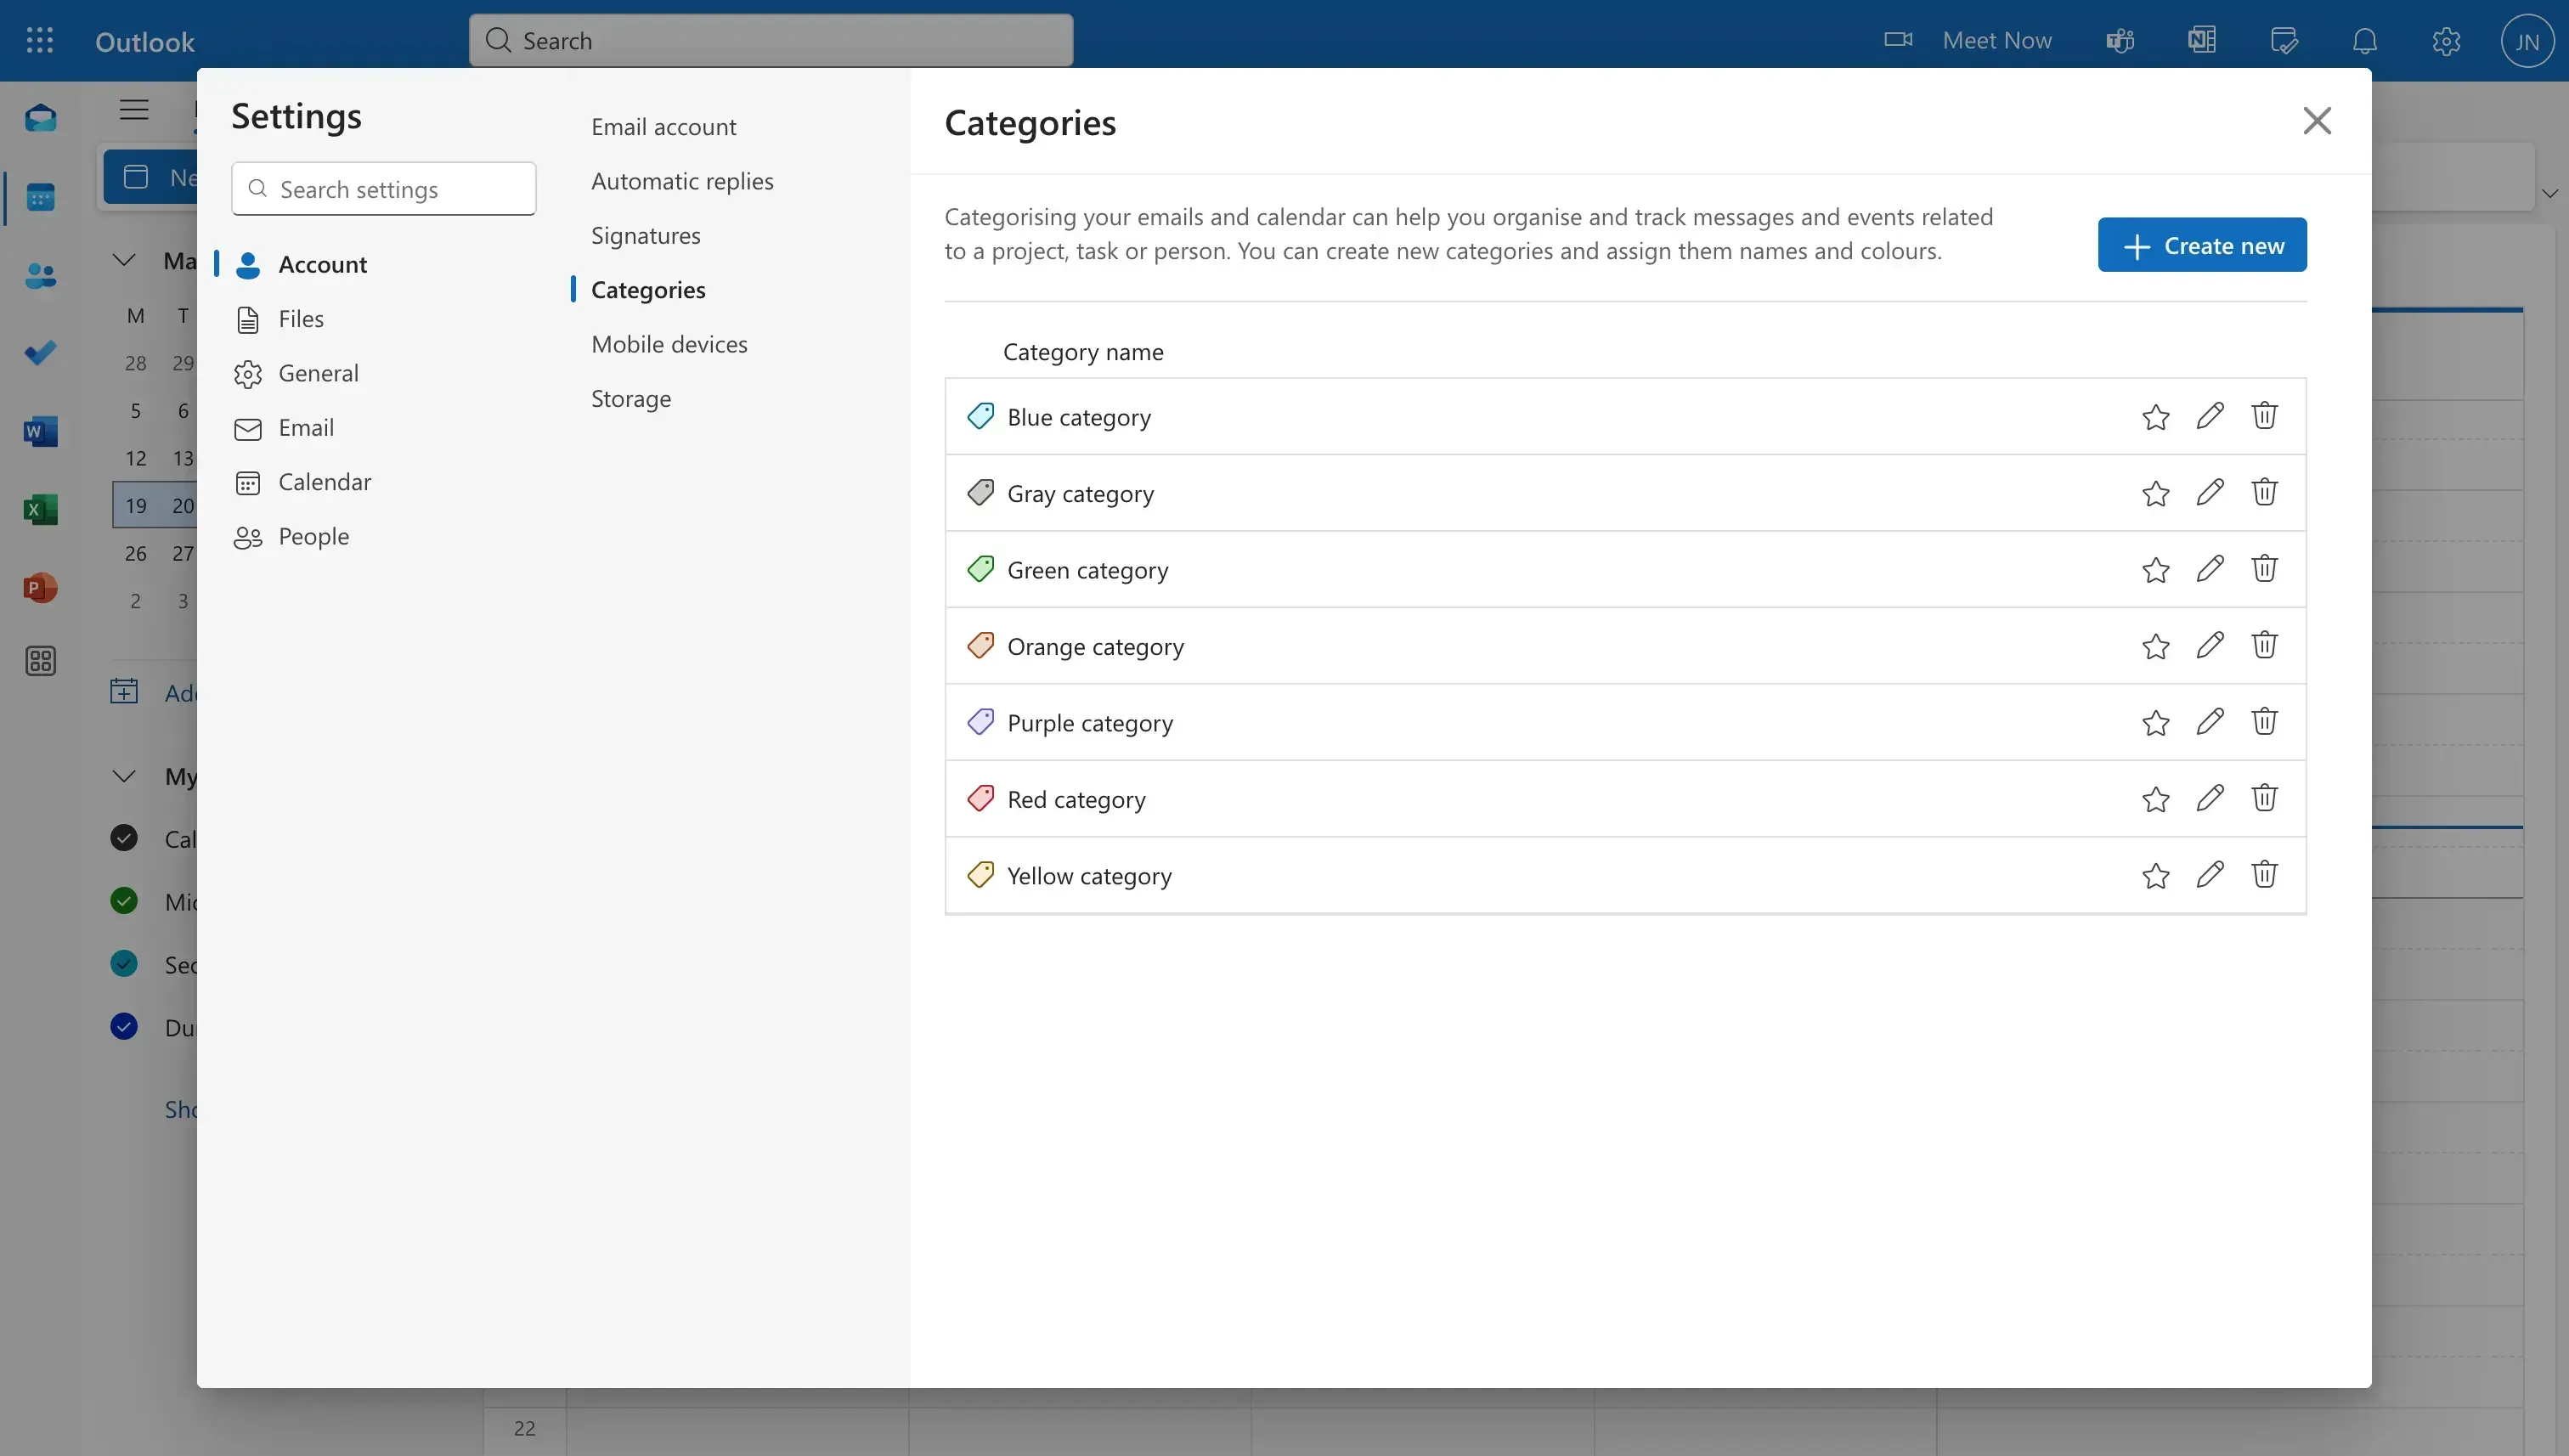
Click “Account”, then “Categories”. On this page, you should be able to see all Outlook Categories.
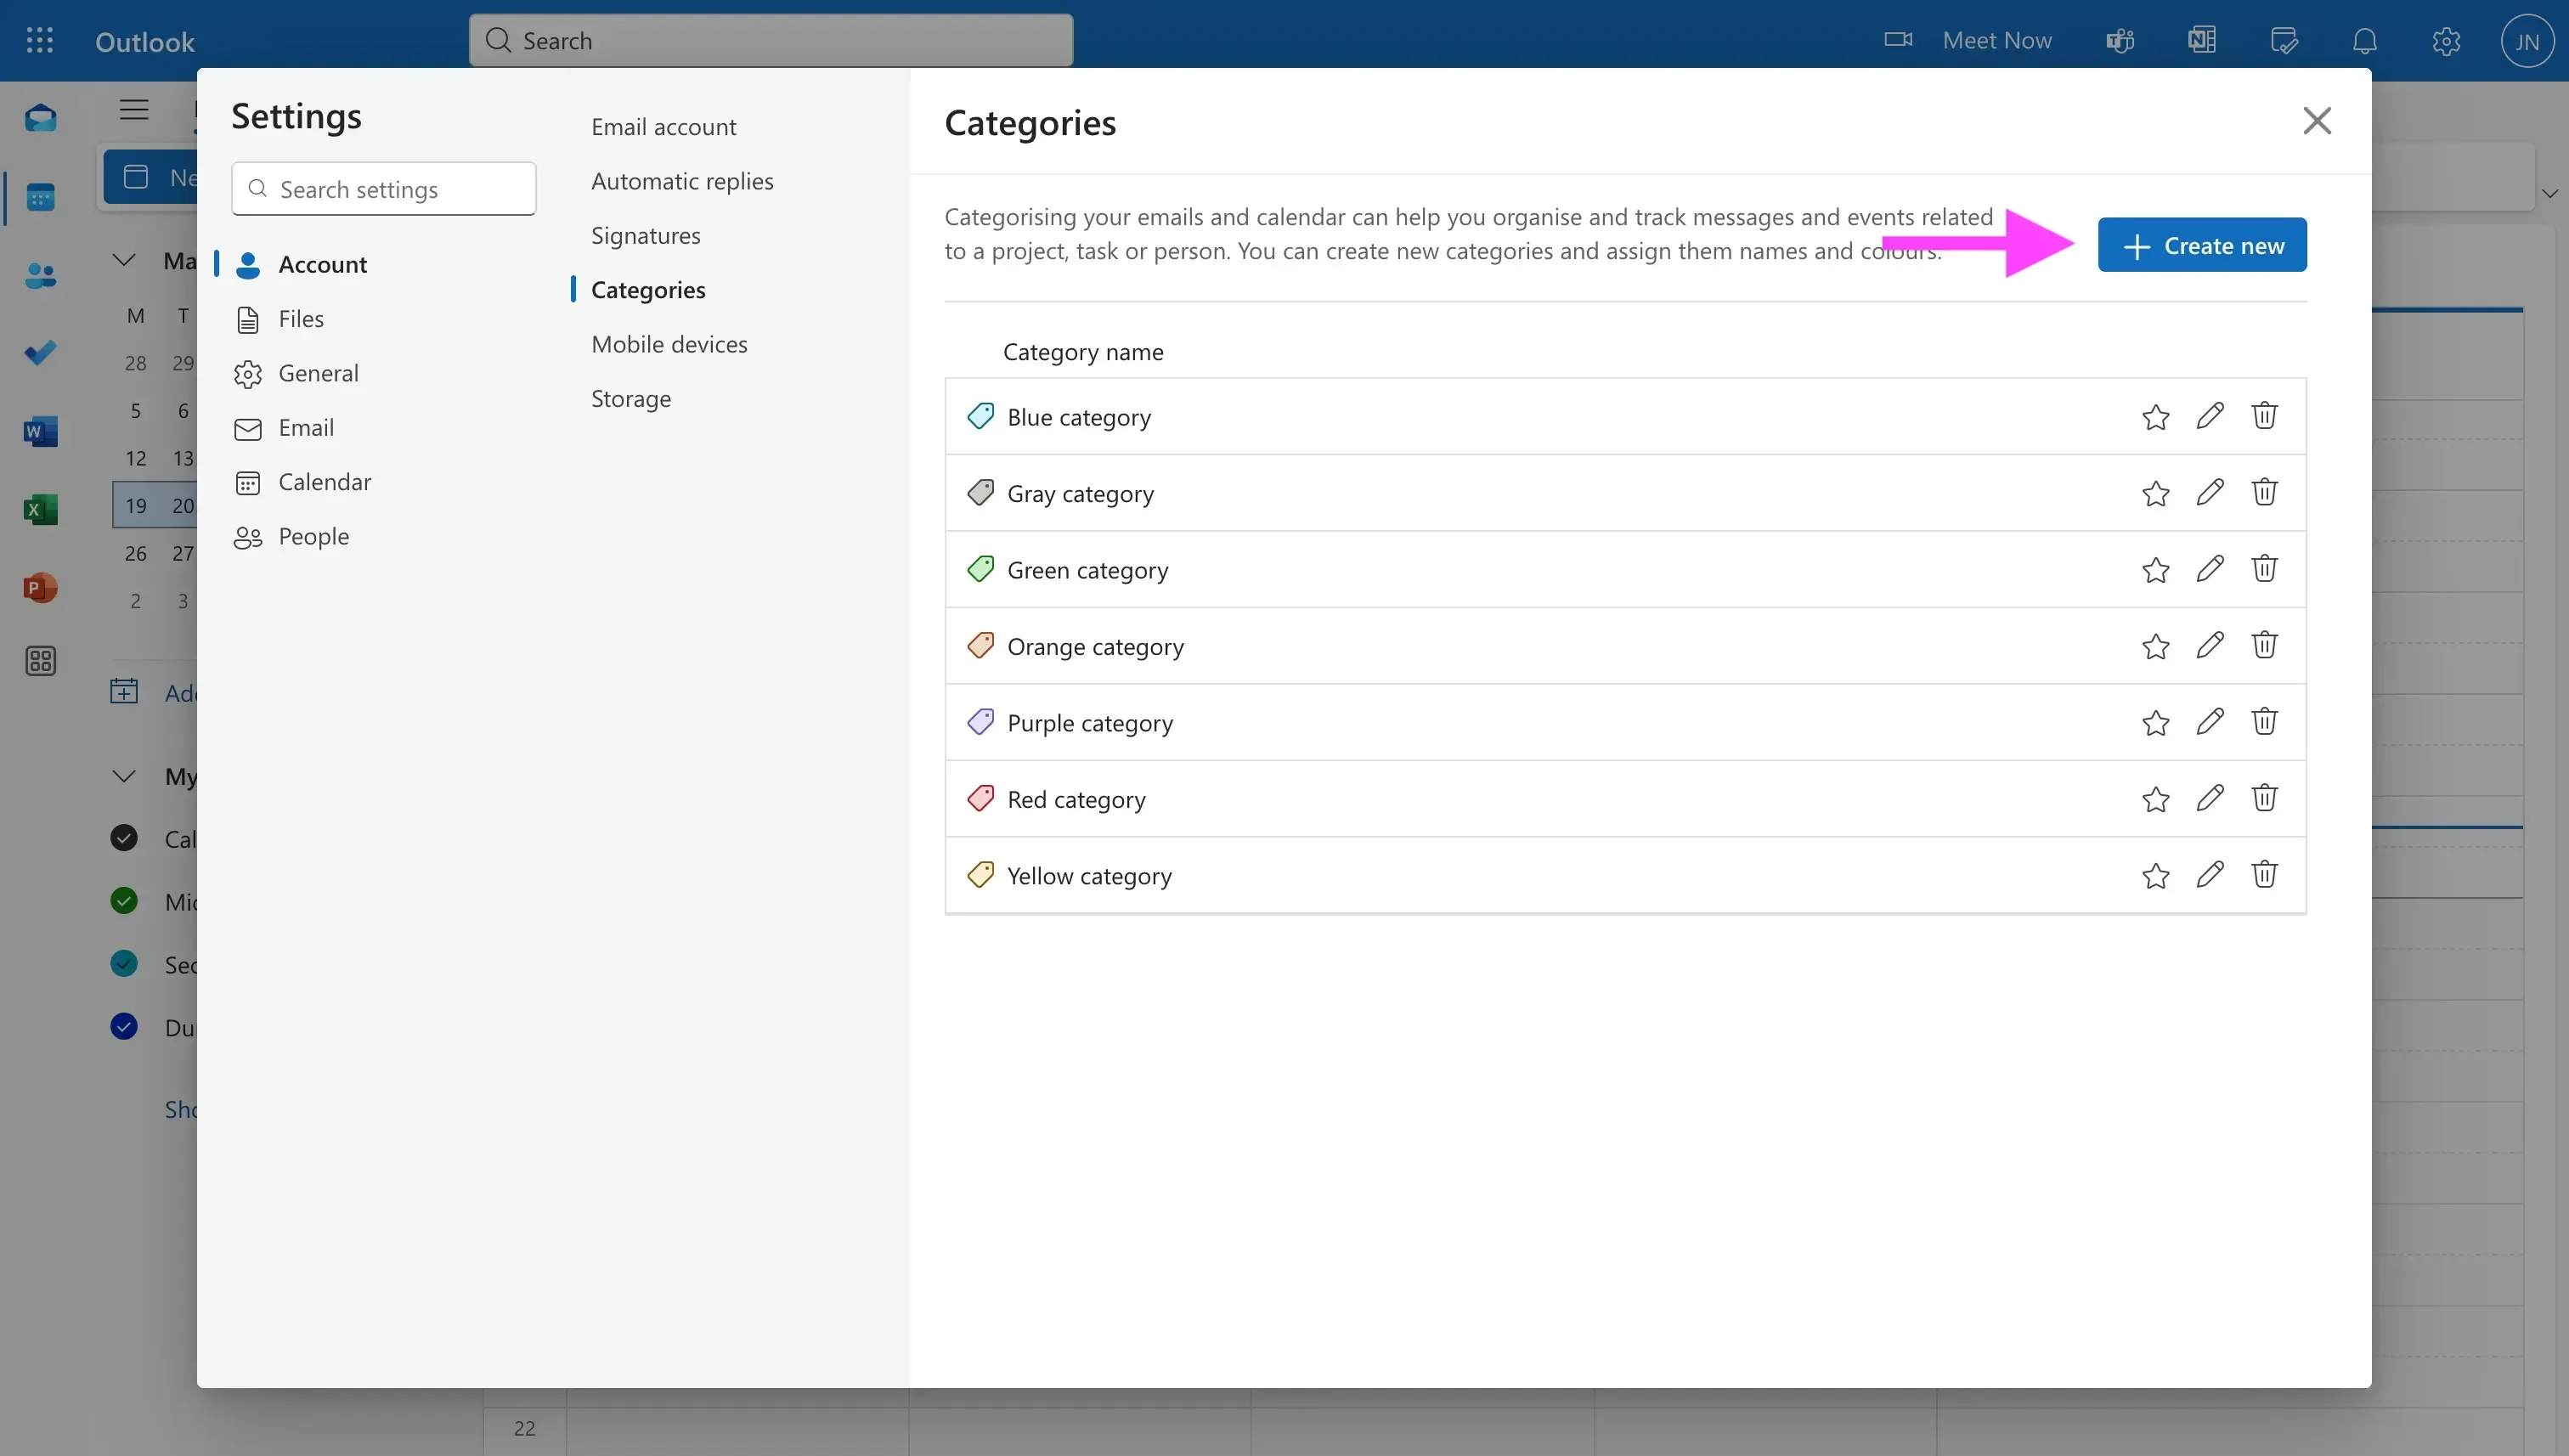
Click “Create New”.
Give the category a name and a color.
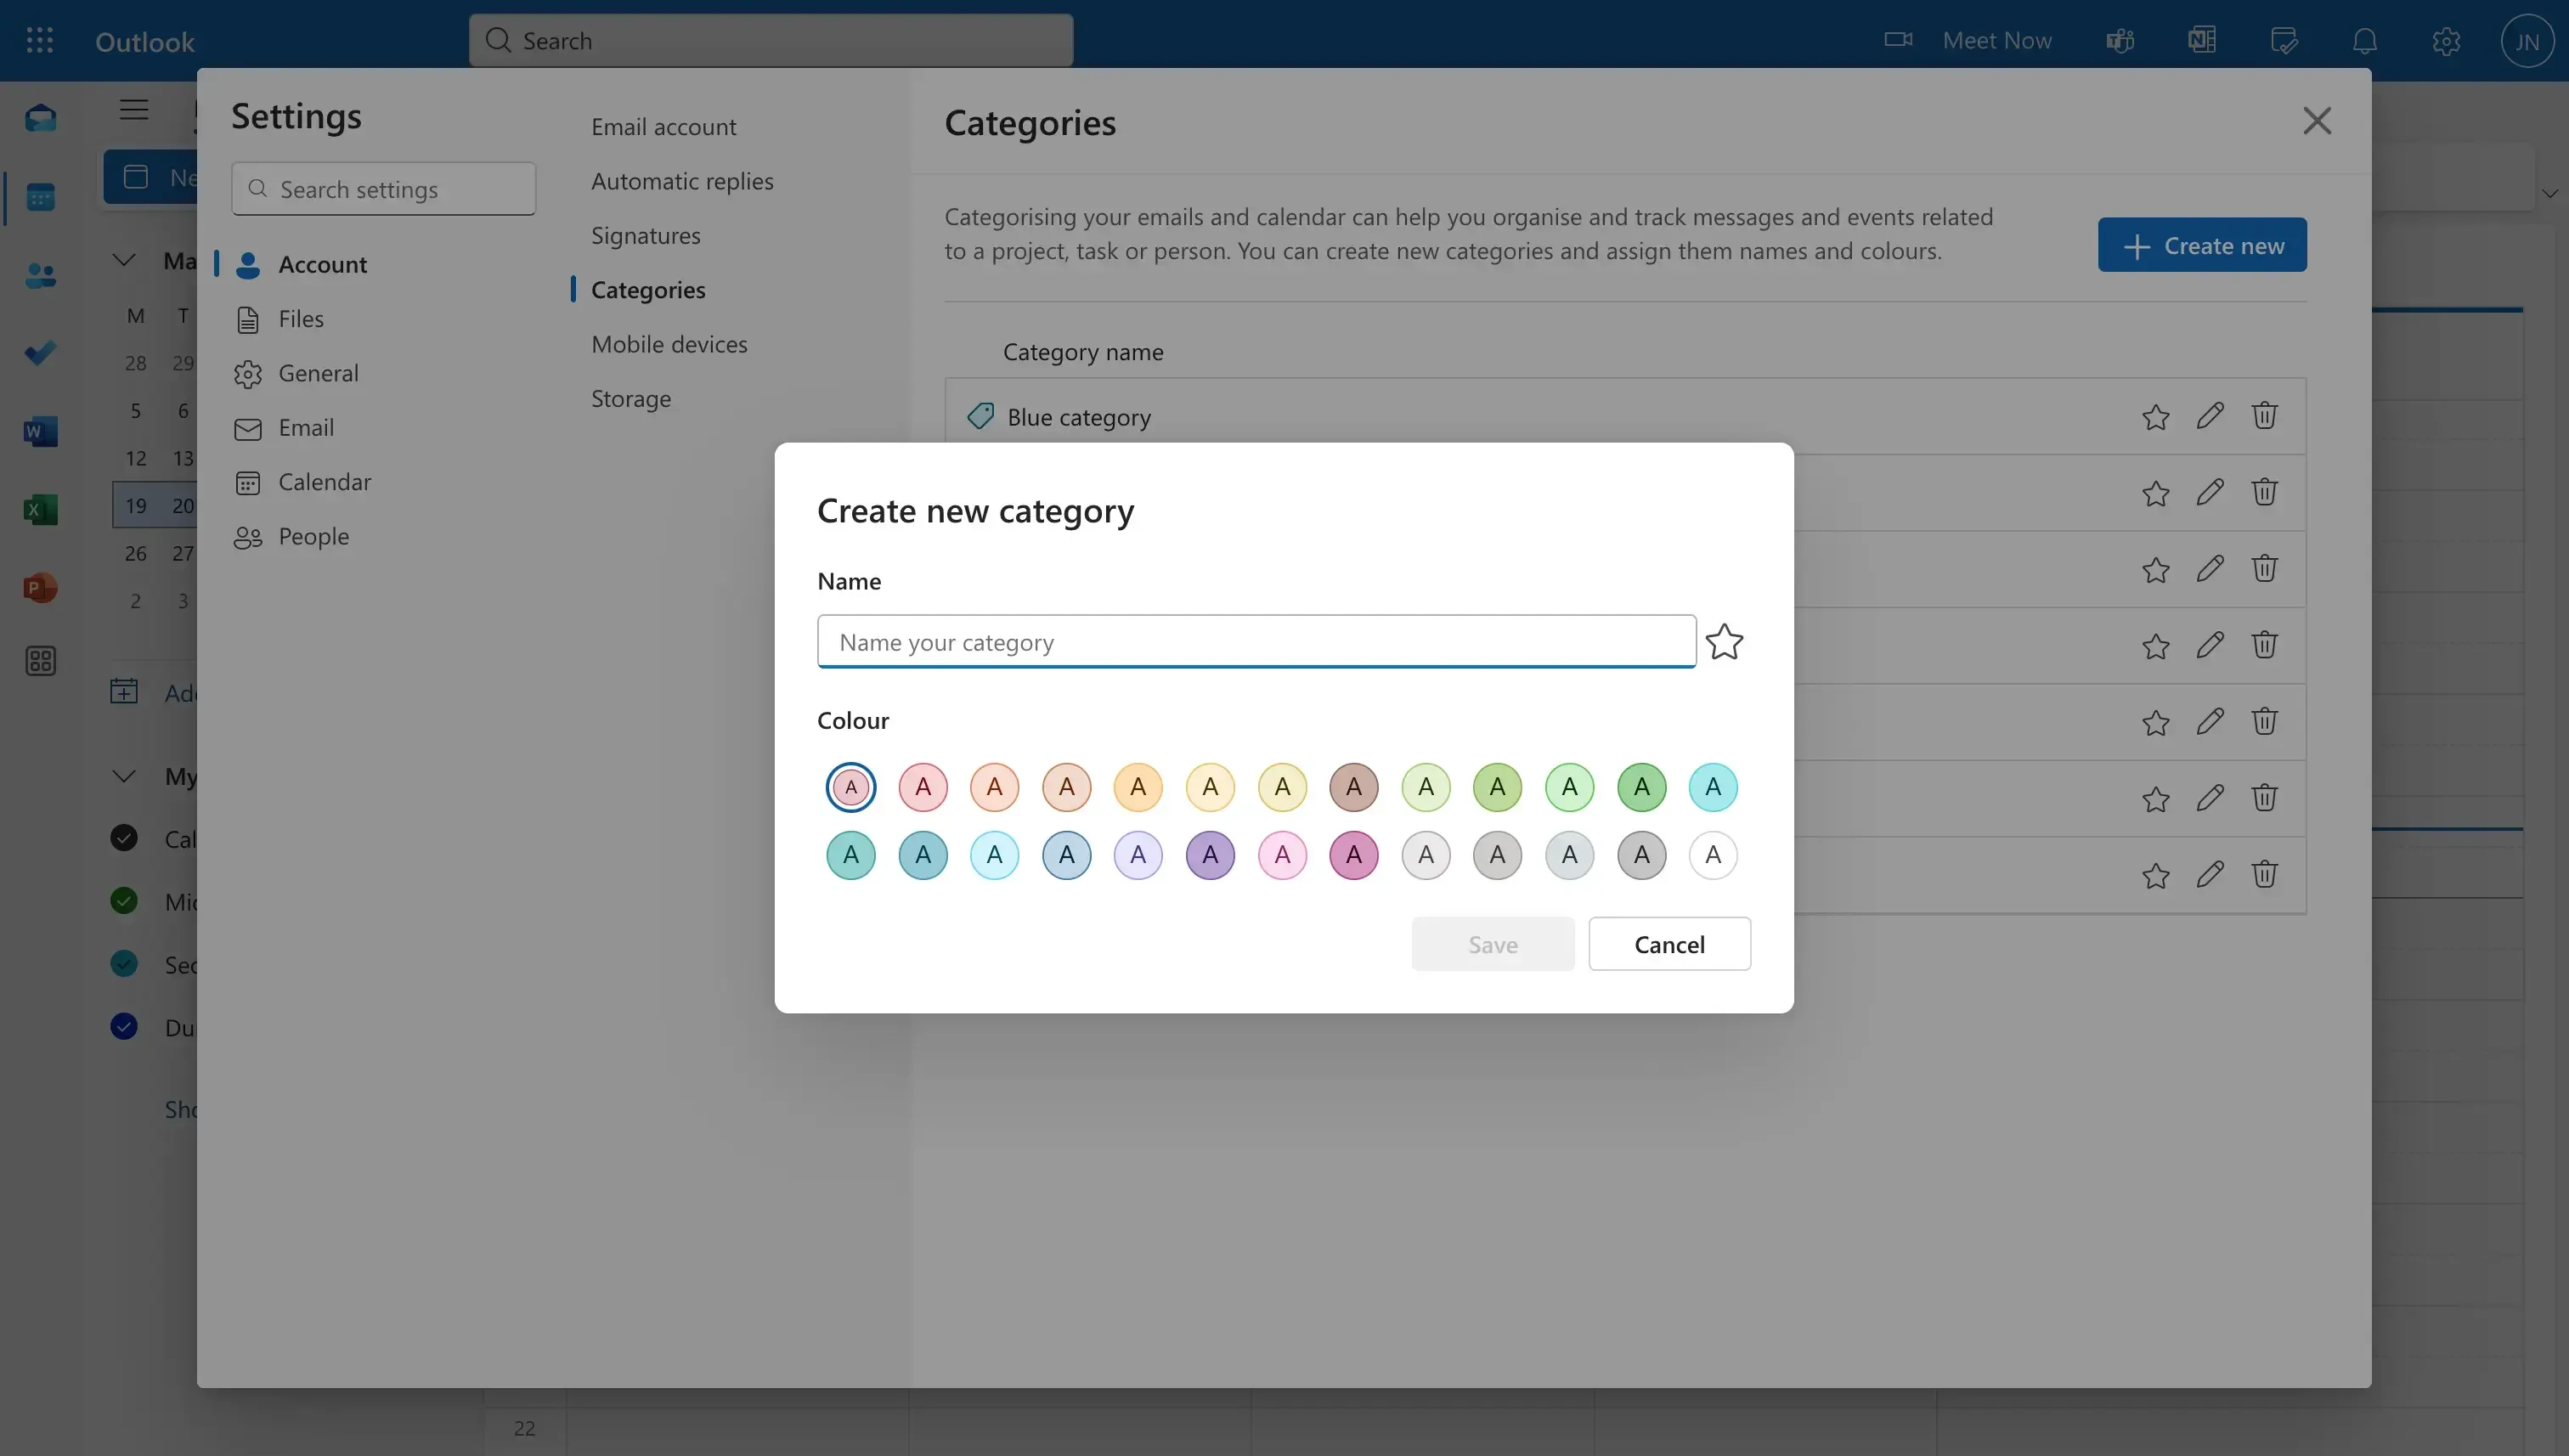
After saving the new category, you can use it to color-code your existing or new events.
How to sync colors between calendars
To sync colors between calendars, you can use a tool like OneCal, which allows you to sync you calendars in real-time, retaining the original colors and event details, or completely overriding them.